Making my Wedding Dress Part 4: The Practice Dress


Well, I absolutely love this, my rehearsal wedding dress. Another labour of love! This dress took approximately twice as long as I thought it would. Because really, it's not even a wearable toile, it's just an earlier version of my wedding dress. Who decides to make TWO wedding dresses? I'm a bit daft sometimes. BUT I was slightly comforted and much more confident after making this as I dove headlong into the Real Thing (and the most expensive fabric I have ever bought in my life), knowing that I had done it all before. Having perfected my patterns and practiced every single technique I needed for my wedding dress, I definitely found the Real Thing much less of a headache.

Also, these shoes are my new absolute FAVOURITES. 

I bought the lace, the duchess satin, the lightweight satin and the netting for the Blue Dress from Whitetree Fabrics. I opted for cheaper materials than my wedding dress. I think the blue lace was £3 per metre. It's a bit scratchy but I was on a budget! The duchess satin is lovely, I'd definitely buy their duchess satin again. It's a lovely weight and quality, and sews like a dream. 


I actually really love that the motif on this lace is bows rather than flowers


There were a lot of firsts for me in the making of the Blue Dress:
- first corselet
- first waist stay
- first spiral steel boning
- first covered buttons
- first rouleau loops
- first time working with duchess satin 
- first bound slit
- first time thread tracing!
- first time draping a bodice
- first time using horsehair braid at the hem 
- first time making a petticoat 
- first hairline seam 

Wow. When I put it like that, I've learned a bucket load in the making of the Blue Dress. And a big bucket at that. 

I used a fair few learning and reference resources along the way, and a LOT of trial and error / making it up. I do not claim that the finished result is perfect, or up to couture standards or anything, but it is blooming lovely and I'm rather proud of it.

THE CORSELET

I almost chickened out of making the corselet. You see, I had listened too much to the "sewing lingerie is hard" voice inside my head, and also to others who had been so supportive of my dress making but said "Oh i would definitely buy your underwear. Give yourself a break!". So I almost chickened out and bought some. Until I actually tried to shop for some.

How do people find good wedding underwear?! The choice was so slim, the designs mostly ridiculous (who wants loads of embellishment and sticky-out-bits like beads and pleats which would probably show through most wedding dresses?) and the fit was ludicrous. I found only one contender. I liked the design, and it would work under the dress. The fit was terrible though. The tops of the cups gaped away from my body, whilst the main bodice section fit well. Plus it ended slightly too high on me, causing a lovely weird bulge. I'm not blaming the designer or manufacturer of this corselet of course. Women's bodies are invariably all incredibly different, how could one expect a perfect fit from a RTW corselet like this? 

Hang on a minute, I thought. The thing I'm most worried about in making my own corselet is getting it to fit well. But the fit is bloody awful on the RTW alternative, so I thought might as well have a go! Nothing to loose! I'm so glad I DID decide have a go.

As I explained in my last post, once I had adapted my corselet pattern (from B4443), I had a skin-tight, hip-length pattern with the exact same neckline as my under bodice. I decided to try spiral steel boning, and I'm so glad I did. I found it much stronger, more effective in structuring the garment, more comfortable and easier to use than plastic or rigelene boning. I decided to have a boning channel on each of the seams in my princess-seamed corselet, and one in between each seam, too. In the end I decided to go with a double layer corselet in order to create the boning channels: I made the corselet twice in lightweight but strong cotton, pinned the two layers together along the seams and sewed through both layers to create the boning channels. I purchased pre-cut spiral steel boning from Vena Cava designs. Their shop is excellent I have to say. 

Then I added a grosgrain waist stay, sewing it to the corselet between the boning. I toyed with the idea of having a separate closure for the waist stay, but as the corselet is skin tight anyway, it seemed pointless. I bought pre-made hook and eye tape for the closure. I hate sewing on hooks and eyes by hand! 

Inside of corselet (next to skin)

Outside of corselet (next to dress)

THE UNDER BODICE

This was pretty straightforward, really. I had my altered B4443 pattern ready to go, and as I said the duchess satin was lovely to sew. The only slightly tricky part was the rouleau loops.

I used a template drawn on paper to get the placement right for the button loops. I basically sewed through the paper, looping my rouleau rope on top, within my markers. Then after sewing I could rip the paper away and trim the loop's edges that were in the S/A. It worked a treat! The only thing I overlooked was to make sure the seams in my little rouleau ropes were facing UP when I sewed them on, so that when I flipped the seam allowance back the pretty, non-seamed side showed. Oh well, I corrected this for my wedding dress!


Testing the theory on scraps first!

I also had to make sure I created an "underlap" section at the centre back, which was also pretty straightforward.

There is also a lining to the under bodice, so I had a bit of a head scratching moment (week) trying to work out how to sew the under bodice, the corselet and the lining together along the neckline, and in what order to do everything. 
Here was the solution: finish underlap section first, add closures (button loops). Sandwich corselet between under bodice and under bodice lining. Sew along neckline. Understitch. 

THE OVER BODICE 

The lace over bodice was the part that scared me. I looked into many, many ways to create a lace over bodice, and ultimately decided to try draping a non-darted bodice with side seams and extra over-the-shoulder pieces to make it easier to drape the right shape. I did a toile first out of some more Whitetree lace I had, and this gave me more confidence to go for it in the blue lace. 


First lace bodice toile pinned over Blue Dress under bodice 


It was slow-going, with lots of pinning, thread-tracing, tacking, re-pinning, trying on... but it worked out in the end.

I knew I wanted a scalloped neckline on my actual wedding dress, but my blue lace did not have a scalloped edge, so I cut around the motifs to create one! This means the neckline shape is a bit different to my wedding dress design, but I like it anyway. 

In sewing the sleeves in I did my first hairline seam (a straight seam with a close zigzag seam right next to it, then trimmed close to the zigzag). I love how neat and delicate it looks.

The back neckline ended up a bit asymmetrical, but I have no idea how!!


THE SKIRTS

The skirts were no problem, they're simple circle skirts. The hems got different treatments though. The lace hem got a normal, hand sewn hem. On the duchess satin skirt, I decided to sew in horsehair braid to help the skirt stick out. It was actually pretty easy to apply and it had the desired effect! I'll definitely be using this stuff again! 

I used the tutorial in Claire B Shaeffer's Couture Techniques book to do the bound slit in the lace skirt layer. This is actually neater than the one I did on my wedding dress! 


THE PETTICOAT

I'd never made a petticoat before, but I knew I wanted to attach the petticoat for my wedding dress to the corselet, so I thought I best do the same on the Blue Dress! When I've worn separate petticoats before I have found they can add a bit of bulk at the waist, plus they can ride up or down and peek out the bottom of the dress unbidden, and I didn't want this with my wedding dress.

I used this excellent tutorial for making my petticoat, and just adapted the measurements slightly, plus sewed a back seam in at the end. I then gathered the lining layer at the top and sewed it onto the corselet halfway between the waist and hip line. It worked a treat! Making a petticoat is so easy! Who knew?


****

This dress was made up of so many elements and MANY hours of sewing. I actually cried when I first tried it on as one piece. It has major sentimental value. Also I've read lots of blogs and had lots of friends who've said they WISHED they could wear their wedding dress again. Wearing my Blue Dress for me is pretty much like wearing my wedding dress again, and it will always be special.

A group of Liam's lovely running mates clubbed together to buy us a meal at the Wolsey as our wedding present. We went a few weeks after our honeymoon and it was so, so nice. The Blue Dress had it's first outing too and I loved wearing it!

Bathroom selfie at the Wolsey! Had to be done!

**** This post is one of a series documenting the making of my wedding dress. Click here to see an index of all posts about sewing my wedding dress! ****

Making my Wedding Dress Part 3: Patterns, Fit and Construction Planning

So, I've talked you through the inspiration for my dress, and the design process. Next up was to plan construction. This was what gave me the most head-scratching. I knew I wanted a corselet or under structure of some kind, and I knew I wanted functioning covered buttons to do up the bodice. So it was working out the construction order of everything that was the trickiest. 


Final design - top layers: lace over duchess satin
Final design - under layers: corselet with attached petticoat
I made a list of techniques I would need to use on the dress that I hadn't used before, and resolved to get some practice in those areas before I made the dress. I bought Couture Sewing by Claire B Shaeffer and it was an invaluable resource, absolutely fantastic and so interesting. Later I also found a Threads Party Dresses magazine, which ended up having the tutorial I used for attaching my corselet. I had made my corselet pattern by this point myself, but it gave me heart to see that I had done it right!

So on to the pattern altering and fitting work! 

The under bodice (sweetheart neckline duchess satin part underneath the lace) was adapted from a pattern I already knew fitted me quite well - B4443. I redrew the neckline, and brought in the princess seams, especially over the bust, to perfect the fit. 


One of my toiles when working on the under bodice fit
For the corselet, I originally tried Kwik Sew 3166, but quickly realised a stretch corselet was not going to give me the structure I wanted. So I started again. I began from my newly altered B4443 under bodice pattern, lengthened it to hip length and then adjusted all the seams until it was skin tight. I basted a zip in to aid fitting and trying on! I did find I had to make big adjustments at the small of my back, as originally I was getting huge fabric pools and wrinkling there. 

The skirt was a good old circle skirt! Deciding on length was tricky and I spent ages dithering over that!!! 

For the lace bodice, I draped. So no pattern needed there, just a few toiles. As I type this, I still can't quite believe I did this, having never draped a thing in my life. And it worked!

First draped toile! You can see my first corselet under there as well.

The sleeve was adapted from the sleeve pattern of V8766. I altered it quite heavily as the V8766 sleeve has pleats at the head whereas I wanted set-in sleeves.

FASTENINGS AND COLSURES

SO, I had decided I would have a corselet fastening with hooks and eyes, the bodice (satin and lace in one layer) fastening with covered buttons and rouleau loops, duchess satin skirt and lace skirt hanging separately, with an invisible zip in the satin layer and a bound slit in the lace layer. 


Late night rouleau loop practice. 
I compared my rouleau samples to the straps on a Hobbs dress I have, until I could get them just as thin.

The rouleau loops and the bound slit were new to me, so I did a few samples first. It was at this point I decided I would make a complete practice version of my wedding dress before cutting into expensive bridal fabric. It just seemed sensible to me to try out all the techniques, and the construction order to make sure it all worked before attempting the real thing. I’m really glad I did this, although of course it made the whole process MUCH longer! 

DOCUMENTING PROGRESS

By Christmas I had my final design and was altering my patterns. I was delighted when one of my Christmas presents from Liam was this gorgeous notebook for me to document the whole process of making my wedding dress!


****


Making my Wedding Dress Part 2: Design & Trying on Dresses!

Once again, here is last year me to talk you through my design process and trying on wedding dresses!


It took me a while to book an appointment to try on wedding dresses. Of course I knew that I should try some on, to make sure that I was on the right track with the designs I had come up with in my head, and also to check out their construction, finishes, and materials. I don’t know what held me back. I think perhaps I was secretly nervous.

When I first had the idea that I’d like to make my dress, I was very much of the thinking that “I can make a dress, I make dresses all the time. This is just an extra-special dress. It’ll be fine!” And that is true, it absolutely is. And I still have faith that I can make my dream dress, but it is a bit more, erm, involved than I first gave it credit for.

One particular morning I was sitting in the green chair (the comfiest seat in our flat), reading each and every sew-your-own wedding dress blog post I could find (I've linked to my favourites here). And WOW. Some sewers out there created full-on masterpieces. 

Then I started reading about foundation layer construction and all things corselet. Then I read about different types of lace and how to piece it together. Then I read umpteen “sewing with silk” articles, and looked at so many beautiful pictures of beautiful garments. Liam came in from the other room, saw my face and said, “what’s up?” “I’m starting to think I’m completely nuts to attempt to make my wedding dress,” I said. He reassured me, and I gave myself a talking to, and order was restored. Anyway, I always had a relatively simple dress in mind, not a princess-like ball gown with a cathedral train. It couldn’t be that hard, could it?

I got to the point where I had a full board on Pinterest of wedding dress ideas, I had sketches of my dress design and I was absolutely set on what I wanted to make. But I hadn’t tried a single wedding dress on. It was at this moment when I sprung into action and booked that appointment. It was either that or leap blindly into making the dress I had already designed, and I decided I needed the trying on help.

I do think I was scared. Scared that I’d fall head over heals for the expensive made-by-someone-else dress. Scared that I’d look awful in every single dress in the shop. Scared that they’d sniff out my plans to make my own dress. Silly, I know, but I definitely think that stopped me.

Well, the day came. As soon as I woke up the thought popped into my head: “I’m going to try wedding dresses on today.” I was so excited. I hadn’t realised I’d be this excited! I beautified slightly, popped my wedding shoes in a bag (they were one of my first purchases) and skipped off to the shop, where I was meeting my best friend and chief bridesmaid, Sammy. Everything was running a bit late at the shop, so we found ourselves sipping Bucks Fizz, reading wedding magazines and books, and giggling at the funny eighties styles. The shop had beautiful things everywhere. Sammy asked, “How do you feel?” and my honest answer was, “weird.” I did feel weird. Excited and nervous and weird. I’d never shopped for a wedding dress before. I’d never legitimately been allowed to try one on before. But now I’m getting married, and it’s time to try them on! Weird!

The thing with wedding dresses is, they’re all beautiful. They’re wedding dresses. And the assistant helping me in the boutique I went to was wonderful and brought out 5 dresses which all ended up suiting my shape wonderfully. She even let us take pictures, which, I’m telling you, was a massive help. 

In each of the dresses I felt great, but there was one in particular that made me feel… tingly. Tingly yet calm inside, content, and absolutely right. There’s no better way to describe it. I felt 100% like me (which was always TOP of my wedding dress requirements list), but like me the bride. It was quite a powerful feeling. If I had £2,000 to drop on a wedding dress I think I’d have bought the thing on the spot. But I’m not just making my dress to save money, it’s really important to me that I craft this special dress with my own hands. And the best thing was that I looked at the Dream Dress and thought: “yes, I absolutely can make a dress like that.”  I’m not saying it will be easy, but I think I can do it!

Before the appointment, I had made myself a little list of things to check for. In the moment though it was hard, especially thinking about construction and fastenings, layers and techniques, as the assistant of course helped me in and out of each dress, so I didn’t have much time to play Poirot. The pictures were such a massive help. In fact, even if I were choosing one to buy I couldn’t have done it without the pictures. Once you step out of one beautiful dress and into another beautiful dress it can be hard to remember what the previous beautiful dress actually looked like. 

When I floated down from my little cloud that evening (having looked again at those pictures about fifty times) I made notes and drawings of everything I had learned from the appointment. The freedom to pull favourite elements from different dresses, add my own ideas and make my dress so truly unique is very exciting!

So now I have a concrete plan for my dress, and a few rather long lists of how I’m going to make it all happen. 

I’m so excited to get started!


****

So, as everyone says, trying on dresses was a game changer. I thought initially I wanted a bodice in silk satin, with cap sleeves and a floaty knee length A-line skirt. But after my day trying on dresses, my design ideas completely changed! My dress ended up being a long sleeved, all lace affair with a calf length full circle skirt and petticoat! You can see all my inspiration on my Pinterest board. If you track it backwards you can see how much the design changed! 


First design!
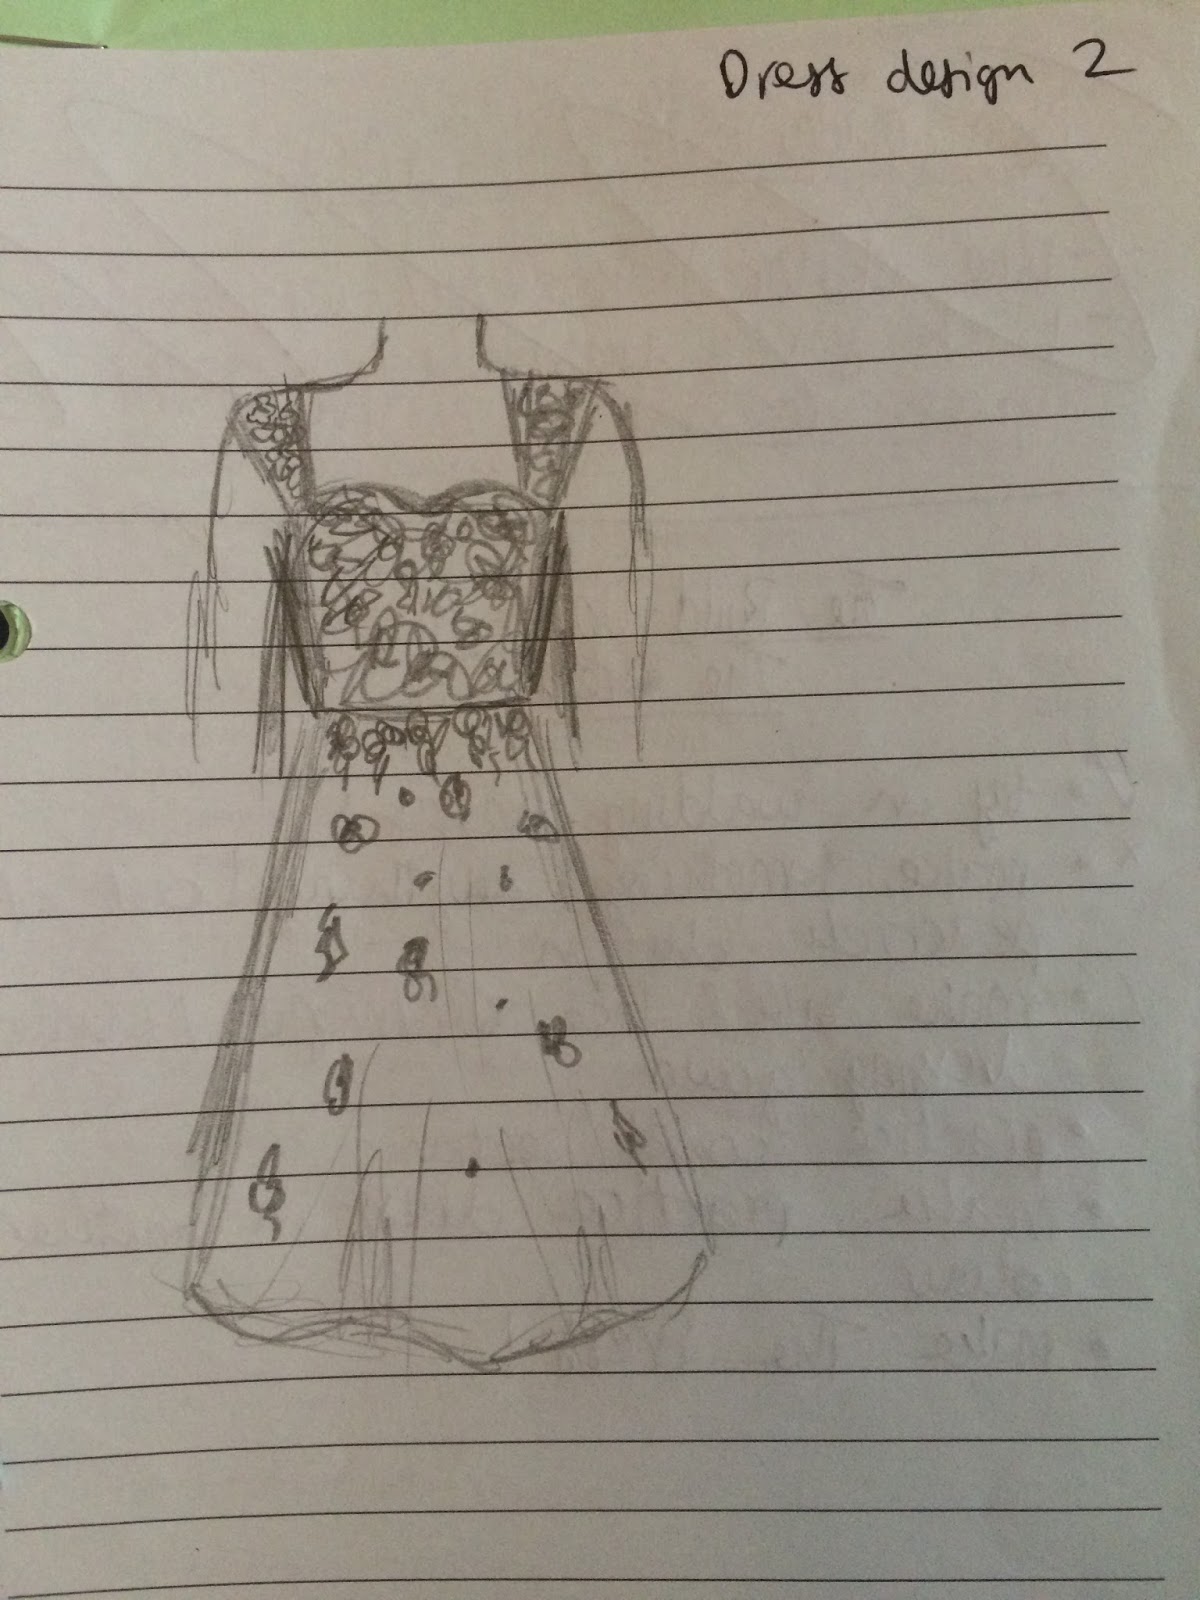
Second design with cascading appliqué lace
Trying on dresses was a huge part of the design change, and really REALLY helped me to settle on which design elements I liked the most and what suited me best, but more important than that, it gave me the confidence to sew my own dress. That was when I properly decided, yes, I was going to do this. That I COULD do it.

Here is my final design (not the best drawing I admit)


****

My next post is all about construction, pattern altering, fitting and techniques I needed to learn. 


Making my Wedding Dress Part 1: The Inspiration

So, now I've shown you all my finished wedding dress, I’m going to hand over to last-year me to tell you about step 1 of the "Making-Of" process…


My well-used wedding planner (home-made of course)

I have finally made up my mind. I’m going to make my wedding dress! I’m brimming with excitement to get going on it! The idea excites me more than it terrifies me, which I think is a good sign. Of course it terrifies me a bit… it’s the biggest, most ambitious, high stakes sewing project I’ve ever taken on. But, I keep telling myself, it is just a dress. A very special dress, but still just a dress.

During my decision-making, I devoured every blog post out there of bloggers who have sewn their own wedding dresses. Let me tell you, every single one of them is so, so inspiring. These ladies made some incredible dresses. Reading these posts convinced me that it is a really good idea to make my own dress. Marrying Liam in a dress I’ve poured so much love, time and care into will surely be such a special thing. Plus our whole wedding is going to be a decidedly homemade affair, so it feels only right. It also feels like Project Wedding Dress is a huge adventure laid out before me. I’m excited not only by the thought of finished product, but also by the journey, and everything I will learn along the way. 

There are many amazing me-made wedding dresses out there. Here are a few of my favourites:

Poppykettle - who made a jaw-droopingly beautiful gown inspired by an Ellie Saab catwalk piece. Such an achievement, and the most stunning, different-to-anything-in-the-bridal-shops dress I have seen. 

Stacey Kigner’s dress which is on A Practical Wedding - so stylish and such a great finish! I also love her wise words of adapting as you go, and trusting your instincts.

So Sew Lovely’s easy travel wedding dress - wow! She looks so great in this and her ‘bustier before the gown’ post has a lot of useful insights!

Sew Dixie-Lou’s GORGEOUS lace dress which she drafted herself! I’m in awe. Check out those invisible darts!

Misha and Mia - HOW did they make this incredible dress in such a short space of time? 

Dolly Clackett - I just adore the fact that her wedding dress is so quintessentially her.

Hello Zoe B - So wonderful! I love the lace and the beautiful silk skirt. It looks like it moves so beautifully.

Queen of Darts - very lovely, and so professional-looking.

Actually, I think that’s one thing that unites all of the sewing blogs I’ve read about me-made wedding dresses. They all look so professional, well-finished, well-fitting and so individual to the women who made them. It makes sense, with all the time and care they have put into them. The results speak for themselves and the brides all look utterly glorious. 

Another deciding factor was also the budget consideration. If I didn’t make my dress, I’m pretty sure I would buy a second hand one online or from a charity shop and perhaps then alter it. The fact is, we just can’t afford to spend £18,000 on our wedding (which is the cost of the average UK wedding! Wah?!), and we also just plain don’t want to. Our budget is much MUCH smaller than that, and I have absolutely no problem with finding solutions to budget-related problems. It’s like a challenge, and as I said, I love a challenge. 

The thing that really tipped me over the edge with my decision though, was that when I mentioned to friends and family, “I think I’m going to make my wedding dress”, every single one of them had the same immediate reaction. “Wow, that’s amazing!” None of them thought I was crazy to attempt it, and they all believed I could do it from the off. 

And so do I. I know it will be hard, but I think perseverance is the key. I’ve got time to make it without having to rush, and if need be I can adapt as I go along. 

So the decision is made! Project Wedding Dress here I come!!!!

****
EDIT: I split up the making of my wedding dress into a few posts, documenting each stage of the journey. You can find an index of them all on this page.


My Home-Sewn Wedding Dress

I married the love of my life on 20th June in a lovely, intimate ceremony with our closest family and friends. We got married in Mayfair Library, the oldest library in London, and it was wonderful. Then we all piled onto a vintage Routemaster and drove over the river to an entirely wonderful reception above one of our most favourite pubs. It was such a wonderful day and we are over the moon with happiness!!!

“The dress! The dress!” all the sewing enthusiasts cry. Well, I decided pretty early on into our engagement that I wanted to have a go at making my dress. I also knew that I’d want to keep the making of the dress a secret. Secret from Liam, and secret from my blog (just in case he saw it!) until after the wedding. Again, this was SUCH a challenge, especially living in a tiny one bedroom flat, but ultimately I’m so glad I kept it as a surprise!! However, I did write blog posts and take photos as I went along, so that now I have a series of “Making My Wedding Dress” posts to share with you, which I’m so, so excited about! Before I go way back to the beginning to share my process with you (along with a huge learning curve!) I thought I would show you what I ended up with.

These images are by the extremely wonderful Hannah Mia Photography. As you can see her photographs are excellent and she is also a lovely person! Thoroughly recommend.

Without further a-do, here is my wedding dress!


Also, I just want to point out that my bridesmaid in the photo above is wearing the first dress she has ever made - a tiffany blue silk satin and chiffon affair which was INCREDIBLE. 


In pursuit of the perfect bow. Also I'm very proud of all those covered buttons.


Here you can sort of see the fit across the bust, and the princess seams of the under bodice. Plus the pretty scalloped edge of the lace which I used on the neckline and sleeve hems. Oh, and yes, here we are getting actual-fact MARRIED.


It was such an incredible, emotional, joyous day and I adored wearing my home-sewn wedding dress. The hours, the love and the determination I poured into that dress made me love wearing it all the more. If I'm honest I still can't quite believe it turned out so well!

Stay tuned for a blow-by-blow account of the dressmaking process!

EDIT: find the blow-by-blow account of the dressmaking process here. I split up the making of my wedding dress into a few posts, documenting each stage of the journey. You can find an index of them all on this page.

Satin and Lace

Hello! It's good to be back and to blog again! We are married and it feels wonderful. Our wedding day was incredible - very emotional! - and our honeymoon in Dubrovnik was perfect. I've got a few things to share with you over the next couple of weeks, while I'm trying to remain patient waiting for our wedding photos from our wonderful photographer. I'm so excited to see them, and also to reveal to you all my home-sewn wedding dress!

But for now, something else...


I made this silk slip/nightdress ages ago, before I even embarked on wedding dress sewing. I decided I needed some practice working with fine fabrics and finishing, and I'm really pleased with the outcome, especially for a first try.

Pattern: the great British sewing bee book 2 - sew you own wardrobe, silk slip 
Fabric: white silk satin from a1 fabrics on goldhawk road, 2m
Notions: 2m 4" wide lace, 2m 1/2" wide lace, silk machine thread 

I'm not going to pretend it's perfect! I know it is not, but I also know what I would change if making it again, and it's good enough for me, being nightwear! I can report it's super comfy to sleep in and feels very luxurious.


The process
I whipped up a toile in some drapey polyester I found in dad's loft. I knew I wouldn't use it to make anything as the 90s-ness is just too much for me, but it’s perfect for toiles. 


Based on my measurements I traced and cut a size 16 and sewed up the toile. I should have known there'd be ridiculous amounts of ease!! Who needs 2" of ease in a bias cut slip? Obviously you need enough to get it on and off and for it to be comfy. The cups fit well in a size 16 though, so I just took the side seams in another 3/8" on each side. Good fit achieved.

The stap making instructions say to cut one strip 20" long, then later cut it in two. I need longer straps than this and ended up cutting two strips 15" long instead. 

I only toiled the lace application on one cup and only toiled one strap, but was happy with how it all went and didn't feel the need to fully finish it. 

Then it was on to the real thing! Eek! And a little gelatine bath for my lovely white silk satin. 

Yes, a gelatine bath. Lynne at Ozzy Blackbeard tipped me off about this technique and sent me a link to an article about gelatine soaking slippery fabrics. Thanks, Lynne! I did some more searching and reading, and it looked like everyone who has tried it loves it, and Sew Busy Lizzy's testament to it sealed the deal. So I bought some gelatine and a bucket, and off I went. And.... It worked! It made the silk so easy to work with!! Wowee this was such a revelation!!!! I will be sewing silk everything from now on!!! I used this method from an article by Threads magazine . 

A quick hand wash after completion removed the gelatine and took my silk back to it's soft, silky goodness. If, like me, you've always been sacred to tackle sewing with silk, try this. It works a charm and makes it all slightly easier to handle. 


The only part that bugs me is that wrinkling under the cups. I know why. I was daft enough to French seam the whole thing, determined to have neatness and comfort throughout. Of course on a curve like that, not being able to clip the curve of the second seam in a French seam puts some strain on the fabric, and gives us those little wrinkles. It seems so obvious now. I should have finished the S/A a different way. 


My favourite part of this pattern is the neat way it has you attach the lace trim to the neckline and top edge. 


I did really enjoy my first foray into any kind of lingerie sewing, and would love to do more. I'm feeling a camisole version of this pattern coming on....


Ree Made May 2015: Big Old Round-Up

Hello! Well, Me Made May has been fun, and as promised here is my one big round-up. I'll try to keep it brief-ish!

As you will recall my pledge was to wear Me-Made on 20 days of May. Did I do it? Yes!


1. Friday 1st May

Sinking sun dressRed hell bunny cardigan
Black tights
Lizzie's black shoes
Black handbag
Leopard print scarf
Cheap Monday sunglasses

Still feeling under the weather, but decidedly less so than I did yesterday - cause for celebration! Voice still weak and swollen :(
Teaching and working all day. I am wearing my friend Lizzie's shoes, because like actual children we accidentally went home from a party wearing each other's shoes.


2. Sunday 3rd May

All aquiver dress Red hell bunny cardigan
Navy tights
Tan T bar shoes
Leopard print scarf
Red and navy fiorelli handbag

Tonight I had a gig with my band in Surrey. I got a loverly long sleep last night and I feel better energy-wise, but very snotty and sore of voice. Happy to report that voice is still there - it will work but I've just not got the usual power! Spent the entire gig just hoping my voice would last out and I wouldn't have to cough my guts up in the middle of a number. Thankfully all worked out OK! Super late back to London but happy and feeling much more like myself again.


3. Monday 3rd May

Taking the michael skirtBlack vest top (H and M)
Cream cropped sweater (miss selfridge)

Bank holiday Monday. Knackered from late gig. Got up late, Stayed in and sewed wedding dress while watching For Me and My Gal (which was fabulous and just the ticket). Later went out for pizza to the Godfather at Crystal Palace, then ate an incredible slice of chocolate cake heaven at the Blackbird Bakery. Then we snuggled down at home to watch the movie Lucy (which we thought was great, by the way). I have to admit, I changed out of my Me Made outfit when we went out to Crystal Palace. It was comfy and practical for about the house, but I still feel a bit lumpy and frumpy in that skirt, so ultimately didn't want to wear it to go out in. It's gotta go, in that case! You win some, you lose some!


4. Tuesday 5th May

Navy Coco (unblogged)
Red jeans (Vera Moda)

Today I had two (very cute) singing classes of small people to teach, then the day was all mine. So with my outfit I went purely for comfort! This is one of my go-to super casual comfy outfits.


5. Wednesday 6th May

Marion the polka dot Emery Teal hell bunny cardigan
Black tights and shoes

Today we went wedding suit shopping! We were shopping for the whole she-bang, and we managed most of it. It wasn't nearly as easy as either of us imagined, but it was fun! Liam got a gorgeous suit, shirt, tie, pocket square, and shoes. He looked so handsome. He's going to cut a dashing figure on our wedding day!
I was doubly happy today. Not only did we have a whole day off together to shop, but I had ballet class tonight which was such a nice release. AND my new favourite cardigan arrived this morning - another Hell Bunny Paloma cardigan in teal. I just absolutely adore my red one and now I want all the colours. I'm trying to limit myself, but by the end of today I had already ordered the black one as well. It was on sale! Black goes with loads of my dresses! I don't need to justify this!! Ah-hem.... I must restrain myself with cardigan buying for the moment, but the navy one, the green one and the pale blue one are next on my list.


6. Friday 8th May

Poet's corner dressJinx jacketUniqlo leggings
Office ankle boots
Vintage belt
Red cashmere scarf (gift)

A very full work day, where extra things just kept appearing that needed doing "ASAP" (which really means NOW, doesn't it?) on top of my normal singing teaching work, and in which I didn't get even half of the things on my list done. Oh well. I do feel rather exhausted though, and there's no let-up yet!
Onto the outfit. Today I surprised myself by rather liking this combination of two "meh" items in my handmade wardrobe. The Poet's Corner dress (viscose BHL Anna) has survived various wardrobe culls because it it is so comfy, and I love the print. I don't think it's all that flattering, and it's definitely too big, but I still enjoyed wearing it today (see comfy note). It's also quite cold today, so I was faced with a jacket conundrum. I don't have a great spring jacket, so in the end I reached for my home sewn Jinx jacket, thinking I was going to hate it. I actually almost gave this jacket to the charity shop, deciding I didn't like it on me and it made me look frumpy. I'm glad I rescued it from the charity shop bag at the last minute, because today I enjoyed wearing it and was grateful for it. I like the print clash between the stripes and florals, and again, it's blooming comfy.


7. Sunday 10th May 

Lady Luck dress (BHL anna)H and M floral shoes

Today I had another gig with the Pink Champagne Sisters, and it was SUCH a nice one. We were singing at the reception for the official VE Day celebrations in St James' Park. It was lovely! Lots going on, loads of stories from the veterans, the crowd all singing along to every number. We also had a troupe of awesome swing dancers jiving to our music, which was cool. So I went with my most 40s-esque dress for my "off-duty" look: the Lady Luck dress. It was such a glorious day, it was nice to be able to have bare legs again! I also met a fellow stitcher (in the RAF I believe) who recongnised the pattern!
Well, I still love this dress but the gaping neckline does drive me slightly nuts. I need to sort that out before the next version, it just doesn't stay flat when I'm wearing it without a lot of coercion. Also my black Hell Bunny "Paloma" cardigan arrived! Woohoo! Just as lovely as its sisters in my wardrobe, and it will get worn a LOT.


8. Monday 11th May

Say your prayers, ice cream! SorbettoOrla Keily for uniqlo trousers
Teal Dorothy Perkins cardigan
No shoes! (At home all day!)

Ah, an "at home" day. Not a day off, sadly, as work continues to pile up from all my jobs!! So the morning was spent working, then a few hours of wedding dress sewing (hem levelling. Oh joy!) followed by an evening of more work. Not much more to report, except I loved wearing this outfit. It's super comfy but more styled than joggers and a tee shirt. Every time I wear my Sorbetto I promise myself I will make more. I'd love to make a couple before honeymoon, but not sure if I'll have time!!


9. Tuesday 12th May

Stevie dressBlack hell bunny cardigan

Teaching today and then sewing! Had a good day! I appear to have grown a tail in this picture...


10. Wednesday 13th May

Rock around the clock dress

An at home day spent sewing and doing admin work for two of my jobs. Halfway through my 20 me made days!


11. Sunday 17th May

The queue dressTeal hell bunny Paloma cardigan
Navy tights

Today was spent at home. Yesterday was such a long, hard and tiring day teaching that I was absolutely spent at the end of it. So today I just really needed a restful day and thankfully I got it. I spent two hours working on my wedding dress, and the rest of the day doing bits of "wedmin" . We crafted our playlists (a very important job!) and worked on the ceremony. Not long till we actually get wed!!!!!

And the outfit. I really enjoyed wearing this today! I often forget how much I like the queue dress and how much comfier my sleeveless emery dresses are (note to self: more of these please).


12. Monday 18th May

Grey matter skirtPurple tee
Black TS belt
Black hell bunny cardigan
Spotty tights
Ankle boots (office)

A getting-stuff-done kind of day. Worked most of the day from home, then worked a lot on our wedding ceremony and some other wedding things, did a food shop and hung out with my Liam. Enjoyed wearing this outfit! I always feel like this kind of shaped skirt is not very flattering on me, but when I was out and about and caught my reflection I think it changed my mind. I adore the combo of spotty tights and ankle boots. Shame I laddered those tights the second I put them on!!!


13. Tuesday 19th May

Poet's corner dressPink belt from apple tree boutique
Black leggings
Ankle boots
Black hell bunny cardigan

Today I was teaching, wedding sewing, doing admin and lots of bits and bobs. I also went for my first run in a LONG time. I really enjoyed it, and could kick myself that I've let myself lapse into laziness, since I loved running today and felt so much better for it! Keep running Ree, it makes you feel good! Bonus was that as soon as I got in from my run the heavens opened and a big thunderstorm raged (for all of five minutes). I Love a good storm. Especially when I'm all warm and dry inside. The evening was spent having long catch up phone chats with my dad, sister and friend. Always guaranteed to perk me up :)


14. Wednesday 20th May

The queue dressRed hell bunny cardigan
Navy tights
Tan T bars

An ace, fun packed day! Got my couple of hours of work done early on , then hopped on the train to my friend and bridesmaid, Sammy's, place. On the agenda today: lunch with Sammy and another of our very good friends from drama school (wahoo!), bridesmaid fabric shopping, trying on my wedding dress!, sewing time, a band meeting and then ballet class. A lot to pack in! Re: the outfit... I love the queue dress and enjoyed it very much today, but I did get caught out by a few gusts of wind.... I enjoy these shoes very much, and my outfit felt well matched today. It wasn't my favourite outfit of the day, that little crown has to go to my wedding dress. I tried it on today and I am SO pleased with it!!!!!


15. Sunday 24th May

Pale blue Dr denim skinny jeans
Say your prayers... Sorbetto Grey cardigan (not pictured)
Nude stilettos  (next)

Let's start with why I was wearing stilettos at home all day. I've just had a big clear out and wardrobe organisation, which included a shoe audit. I got rid of 5 pairs of shoes (ebay, charity shop and sadly the bin for a few very worn out pairs), keeping a very select selection, which left me with three pairs of shoes ON TRIAL. "What have they done?" Liam asked. Been uncomfortable and not worn enough was my answer. So, the shoes that are on trial have to prove themselves! The nude pair, I suspect, may just need wearing in properly (the first and only time I've worn them was when they were brand new and I was just so excited I wanted to wear them right away) so I'm giving it a go.
Day one of their trial went in their favour but we'll see.

Oh yes and today I wore my Sorbetto again. It's very comfy and easy to wear. It bugs me how short it is though. Must make another version refining the fit and shape for my preferences.


16. Monday 25th May

Flowers for jane dressNew look criss  cross sandals

Today I sewed the hem of my wedding dress (woohoo!) while watching Clueless, which renders it officially finished!!!! I am wearing in these new look sandals for my honeymoon. Don't want any blisters!

I also ate jacket potatoes, tidied and cleaned and also reluctantly did a little bit of work. A good day. I like this dress.

17. Tuesday 26th May

Red jeans
Blue coco (unblogged)

Uh oh, no photo today!!!! I didn't really want to wear this outfit today, but I needed something practical as I was helping my dad get a kiln out of a school (and down 2 flights of stairs). It took 5 men, some Roman style use of planks and rollers and little me positioning the boards and being of no muscle use at all. It was nice to see dad though.


18. Wednesday 27th May

Rock around the clock dressBlack hell hubby cardigan
Nude ballet flats

Today was a running errands type of day, and I managed to get a lot done. Then ballet class in the evening which is always fun!


19. Thursday 28th May

Say your prayers, ice cream! SorbettoOrla Keily trousers
Teal cardi
Fuschia oasis pointed flats

I like this outfit, so I'm wearing it again!! Today I had rehearsals in the morning for my band's gig on Monday, I got my hair cut and shopped for Liam's wedding present. Then I went round to my mate Sammy's flat to help her give some silk a gelatine bath (the silk she is using to make her bridesmaid dress with), then I hurried home to do some admin work and then late into the night do some wedding gift sewing. A busy day! No proper photo so I have included this one of my amazement that the hairdresser managed to get some volume into my hair. Thanks, Ola!

20. Friday 29th May

Sinking sun dressBlack tights
Black hell bunny cardigan
Black ankle boots

Work work work all day. This morning I had to edit lots of backing tracks for the kids I teach, plus edit and print a hefty stack of scripts, then head out to teach said children. I get home at 9.30 pm on a Friday so am always a bit frazzled! No photo again today! Bad blogger!!!


21. Sunday 31st May

Lady Luck dress

Yes, I did one day extra, cause I'm cocky like that.

Also, look which shoes I'm wearing in today... THE BEST ONES EVER. I ordered them immediately after seeing Forever Amber's polka dot ones.


So, Me Made May is at an end. Did I learn anything? Just that I really, really want to get back to sewing everyday things (my wedding dress is AWESOME but has been a huge time-sap). From next month it'll be new clothes-a-pleaty for me! I've got a to-sew list as long as my arm and I can't wait to get going on it.

Thanks for reading (and for not falling asleep). xx